This Azure AI Vision article will show you how to create a .NET app that reads handwritten text using Azure AI Vision.
Microsoft Azure AI Services offers several AI services that can help streamline business processes or create in-house applications that can replace SaaS apps.
Azure AI Vision allows us to work with objects through images and videos. One of the services’ capabilities is the ability to read text in the form of an image or handwriting.
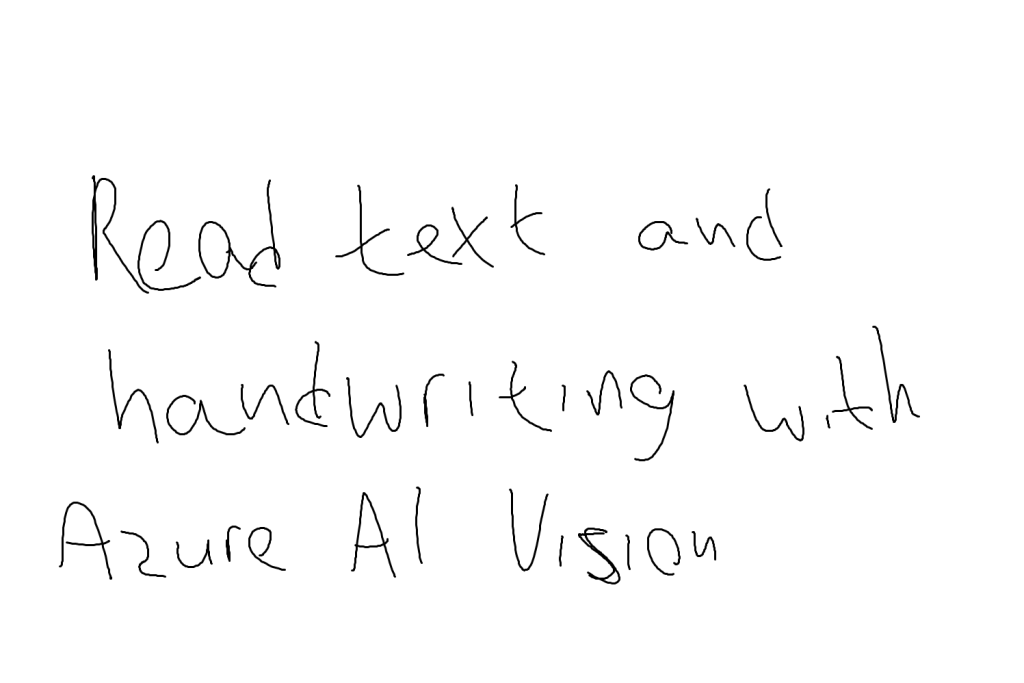
In this post, we pass the following image to a .NET C# application and read the text. The result will be the output of the text to the console.

Create Azure AI Vision Service
Before starting, we need to create an Azure AI Vision service. In our case, we are using Azure Bicep to provision the service using the following code. The code will also output the endpoint and key, which we will need to authenticate to the services later on.
resource aivision 'Microsoft.CognitiveServices/accounts@2023-05-01' = {
  name: 'CognitiveServices'
  location: 'southeastasia'

  sku: {
    name: 'S0'
  }
  kind: 'CognitiveServices'
  properties: {

  }

}


output cognitiveServiceEndpoint string = aivision.properties.endpoint
output cognitiveServiceKey string = listKeys(aivision.id, '2022-12-01').key1
Once the service is provided, create a console application using Dotnet CLI or Visual Studio.
Reading Handwriting with Azure AI Vision and .NET C#
After creating the console application, the first thing we need to do is use appsettings.json to save the login credentials for the AI Vision service. In our case, we are using the following file (add your key and endpoint to the file).
{
  "AIServicesEndpoint": "ENDPOINT URL",
  "AIServicesKey": "KEY"
}
Below, you can see the structure of the application.

The images directory is used to store the handwriting images.
Program.cs
The application code is shown below.
using System;
using System.IO;
using System.Linq;
using System.Drawing;
using System.Collections.Generic;
using System.Threading;
using System.Threading.Tasks;
using Microsoft.Extensions.Configuration;
using Azure;
using Azure.AI.Vision.ImageAnalysis;


public class Program
{
    static void Main()
    {
        AnalyzeImages();
    }

    static void AnalyzeImages()
    {
        // Get config settings from AppSettings
        IConfigurationBuilder builder = new ConfigurationBuilder().AddJsonFile("appsettings.json");
        IConfigurationRoot configuration = builder.Build();
        string aiSvcEndpoint = configuration["AIServicesEndpoint"];
        string aiSvcKey = configuration["AIServicesKey"];

        ImageAnalysisClient client = new ImageAnalysisClient(
            new Uri(aiSvcEndpoint),
            new AzureKeyCredential(aiSvcKey));

        string[] imageFiles = Directory.GetFiles("images");

        foreach (string imageFile in imageFiles)
        {
            using FileStream stream = new FileStream(imageFile, FileMode.Open);

            ImageAnalysisResult result = client.Analyze(
                BinaryData.FromStream(stream),
                VisualFeatures.Read);
            stream.Close();

            if (result.Read != null)
            {
                Console.WriteLine($"The following text was found in image: {Path.GetFileName(imageFile)}");

                // Prepare image for drawing
                System.Drawing.Image image = System.Drawing.Image.FromFile(imageFile);
                Graphics graphics = Graphics.FromImage(image);
                Pen pen = new Pen(Color.Cyan, 3);

                foreach (var line in result.Read.Blocks.SelectMany(block => block.Lines))
                {
                    // Return the text detected in the image
                    Console.WriteLine($"   '{line.Text}'");

                    // Draw bounding box around line
                    var drawLinePolygon = true;

                    // Draw line bounding polygon
                    if (drawLinePolygon)
                    {
                        var r = line.BoundingPolygon;

                        Point[] polygonPoints = {
                         new Point(r[0].X, r[0].Y),
                         new Point(r[1].X, r[1].Y),
                         new Point(r[2].X, r[2].Y),
                         new Point(r[3].X, r[3].Y)
                     };

                        graphics.DrawPolygon(pen, polygonPoints);
                    }

                }

                // Save image
                String output_file = $"{Path.GetFileName(imageFile)}_textResult.jpg";
                image.Save(output_file);
                Console.WriteLine("\nResults saved in " + output_file + "\n");
            }


        }
    }
}
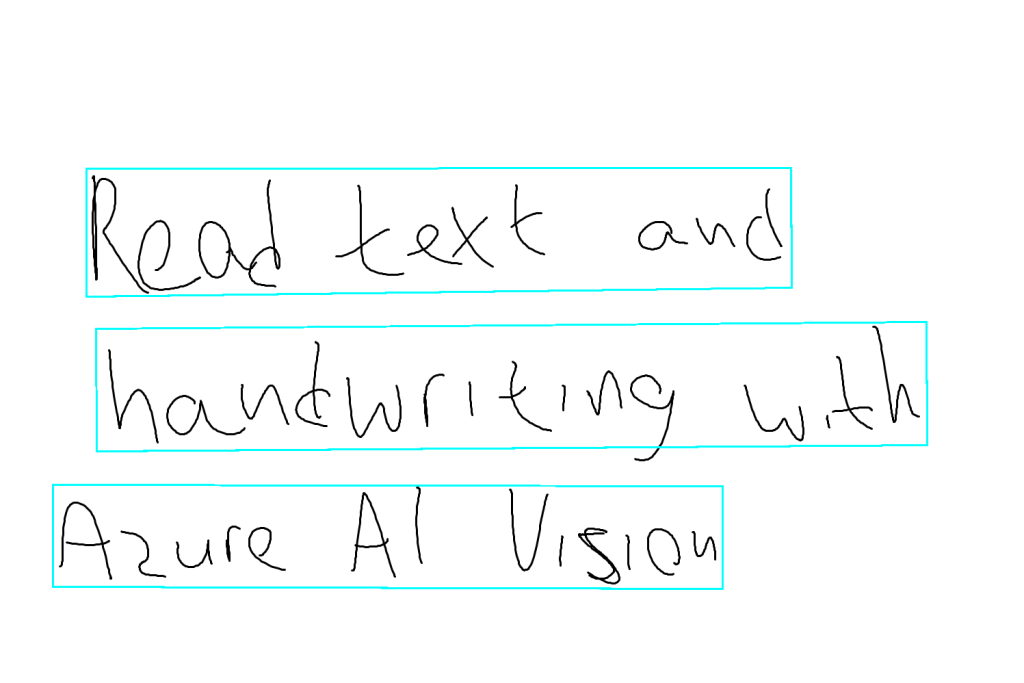
The results are also saved to the root directory and will highlight the detected text.

If you need assistance developing AI-based applications using Azure AI Services, please use the form below to contact us.
Read More AI Articles
Discover more from CPI Consulting -Specialist Azure Consultancy
Subscribe to get the latest posts sent to your email.


