

This Microsoft Azure AI Vision post will show how to use Azure AI Vision with C# to analyze images.
Table of contents
The Azure AI Vision service is part of the Azure AI Services family and offers the following capabilities.
- Optical Character Recognition (OCR) – OCR allows us to extract text from images (printed or handwritten)
- Image Analysis – Extract visual features from images, provide captions, and recognize faces and objects.
- Face – Recognise human faces that can be used for Facial recognition software (image blurring, identification and access control)
The above list can help develop AI solutions to detect humans or objects using Azure’s deep-learning-based models.
.NET SDK
To access Azure AI Vision programmatically, we can use one of the available SDKs for the service (Python, Java, NET). In our case, we will use the Azure SDK for .NET using a C# application that takes an image and passes it to the service.
The first step in using the SDK is providing AI Vision service in Azure.
Create an Azure AI Vision resource using Bicep
To deploy an Azure AI Vision to Azure, we will use Azure Bicep. Bicep is a Domain-specific language (DSL) used for infrastructure provisioning.
The following main.bicep file will create an Azure AI Vision resource.
resource aivision'Microsoft.CognitiveServices/accounts@2023-05-01' = {
  name: 'CognitiveServices'
  location: 'southeastasia'

  sku: {
    name: 'S0'
  }
  kind: 'ComputerVision'
  properties: {

  }

}
To deploy the resource, install Azure PowerShell and log into Azure.
Create a resource group.
Run the following command to deploy the resource.
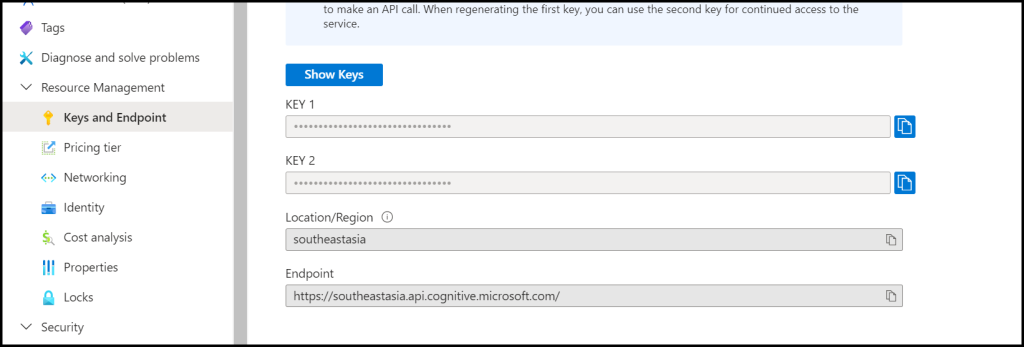
New-AzResourceGroupDeployment -ResourceGroupName "RG-AI-VISION" -TemplateFile .\main.bicepAfter deploying the resource, open it from the portal and note the Key and Endpoint details, as we will use them later.
Use Azure AI Vision With C# to Analyze Images
After creating the AI Vision resource, we are ready to use the SDK and create a program that uses the AI Vision service.
Start with creating a C# Console application using the following command.
dotnet new console Copy the following content to your .csproj file. The file contains all the program’s packages and adds the option to use appsettings.json to store the key and endpoint details.
<Project Sdk="Microsoft.NET.Sdk">

  <PropertyGroup>
    <OutputType>Exe</OutputType>
    <TargetFramework>net8.0</TargetFramework>
    <RootNamespace>ai_vision</RootNamespace>
    <ImplicitUsings>enable</ImplicitUsings>
    <Nullable>enable</Nullable>
  </PropertyGroup>

  <ItemGroup>
    <PackageReference Include="Azure.AI.Vision.ImageAnalysis" Version="1.0.0-beta.1" />
    <PackageReference Include="Microsoft.Azure.CognitiveServices.Vision.ComputerVision" Version="7.0.1" />
    <PackageReference Include="Microsoft.Extensions.Configuration" Version="8.0.0" />
    <PackageReference Include="Microsoft.Extensions.Configuration.Json" Version="8.0.0" />
  </ItemGroup>

  <!-- Add this ItemGroup to ensure appsettings.json is copied to the output directory -->
  <ItemGroup>
    <None Update="appsettings.json">
      <CopyToOutputDirectory>PreserveNewest</CopyToOutputDirectory>
    </None>
  </ItemGroup>

</Project>
Create a file called appsettings.json in the application’s root folder and add the resource Key and Endpoint.
{
  "AIServicesEndpoint": "Endpoint",
  "AIServicesKey": "Key"
}
In the Program.cs file, add the following code.
using System;
using System.IO;
using System.Net.Http;
using System.Net.Http.Headers;
using System.Text;
using System.Text.Json;
using System.Threading.Tasks;
using System.Drawing;
using Microsoft.Extensions.Configuration;
using Azure;
using Azure.AI.Vision.ImageAnalysis;  // AI Vision namespace

public class Program
{
    static void Main()
    {

        AnalyzeImage();


    }
    static void AnalyzeImage()
    {

        // Get config settings from AppSettings
        IConfigurationBuilder builder = new ConfigurationBuilder().AddJsonFile("appsettings.json");
        IConfigurationRoot configuration = builder.Build();
        string aiSvcEndpoint = configuration["AIServicesEndpoint"];
        string aiSvcKey = configuration["AIServicesKey"];

        ImageAnalysisClient client = new ImageAnalysisClient(
            new Uri(aiSvcEndpoint),
            new AzureKeyCredential(aiSvcKey));

        string imageFile = "images/vpn.jpg";
        using FileStream stream = new FileStream(imageFile, FileMode.Open);


        ImageAnalysisResult result = client.Analyze(
        BinaryData.FromStream(stream),
         VisualFeatures.Caption |
         VisualFeatures.DenseCaptions |
         VisualFeatures.Objects |
         VisualFeatures.Tags |
         VisualFeatures.People);


        Console.WriteLine("Image analysis results:");
        Console.WriteLine(" Caption:");
        Console.WriteLine($"   '{result.Caption.Text}', Confidence {result.Caption.Confidence:F4}");


    }


}
To test the application, create a directory called images in the root folder and add images.
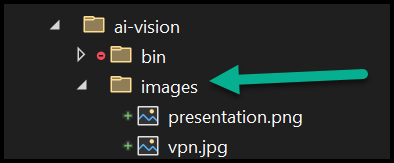
In the program.cs, you can set the name of the image to specify which image AI Vision will analyse.
string imageFile = "images/vpn.jpg";Note: You can easily change this to either prompt for an image name read all the images inside the folder.
Run Application
To run the application, open the terminal window and run
dotnet run The output will look similar to the text below.
Image analysis results:
 Caption:
   'a computer network with many devices connected to it', Confidence 0.5890
Related Articles
Discover more from CPI Consulting Pty Ltd Experts in Cloud, AI and Cybersecurity
Subscribe to get the latest posts sent to your email.