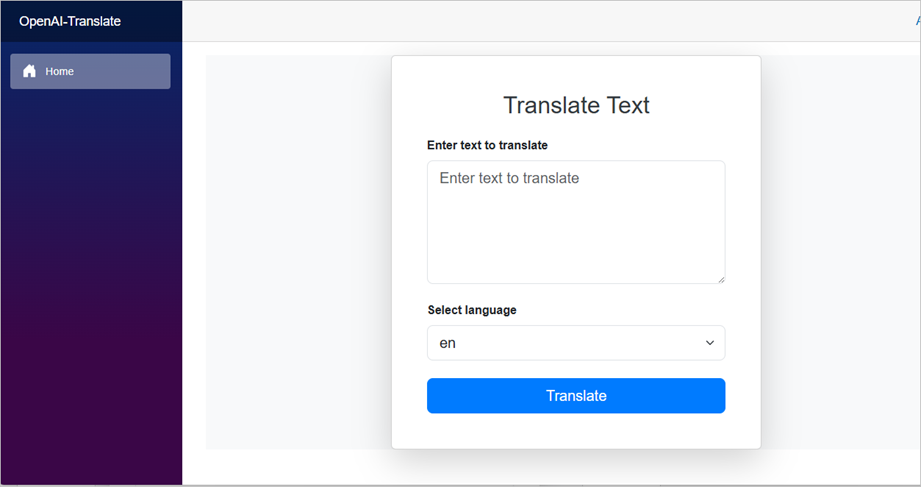
In this OpenAI .NET blog post, we will demonstrate how to create a web application running on Blazor that translates text using GPT-4o.
With the official OpenAI .NET library, it is possible to leverage the entire OpenAI API, including the latest Responses API. This post will guide you in creating a simple web application that translates text from English to two languages (additional languages can be added).
Get Started
To create the web application, an OpenAI developer account with an API key is required to make API calls to the OpenAI API service.
Create Blazor Web Application
To create a Blazor web application, use Dotnet CLI (`dotnet new blazor`) or Visual Studio Code.
Install OpenAI .NET Library
The main component of the web application is the OpenAI .NET library. To utilize the latest features, install the latest version using the following dotnet command:
dotnet add package OpenAI --prereleaseCreate OpenAI Service
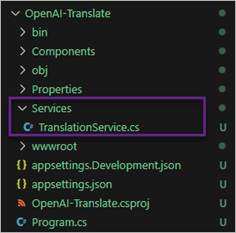
To interact with the OpenAI API, a service needs to be created to send the text for translation to the GPT-4o LLM model. From the root folder of the Blazor application, create a folder named Services. Inside this folder, create a file named TranslateService.cs.
Service Configuration
With the folder structure established, we can proceed to configure the service. The following code snippet creates a service and a function that receives text input along with the target language for translation.
using OpenAI.Chat;

namespace OpenAI_Translate.Services

{

    public class TranslationService

    {

        public async Task<string> TranslateAsync(string inputText, string toLanguage)

        {

           ChatClient client = new(model: "gpt-4o", apiKey: Environment.GetEnvironmentVariable("OPENAI_API_KEY"));

            try

            {

                // Use OpenAI API to translate text

                var prompt = $"Translate the following text to {toLanguage}: {inputText}";

                ChatCompletion completion = await client.CompleteChatAsync(prompt);

                // Extract the translated text

                return completion.Content[0].Text.Trim();

            }

            catch (Exception ex)

            {

                // Handle exceptions

                return $"Translation failed: {ex.Message}";

            }

        }

    }

}
Add Service to main
Add the following code in the Program.cs file to register the service.
    builder.Services.AddSingleton<TranslationService>();
    builder.Services.AddScoped<TranslationService>();
User Interface
Finally, create a user interface to send input to the service. Add the following code to the Home.razor page.
@page "/"

@using Services

@rendermode InteractiveServer

<PageTitle>Home</PageTitle>

<div class="d-flex justify-content-center align-items-center" style="min-height: 80vh; background-color: #f8f9fa;">

    <div class="card shadow-lg p-5 bg-white rounded" style="width: 50%; max-width: 800px;">

        <h2 class="text-center mb-4" style="color: #343a40;">Translate Text</h2>

        <EditForm Model="@inputText" OnValidSubmit="TranslateText">

            <div class="mb-4">

                <label for="inputText" class="form-label" style="font-weight: 600;">Enter text to translate</label>

                <textarea id="inputText" class="form-control form-control-lg" rows="5" placeholder="Enter text to translate" @bind="inputText"></textarea>

            </div>

            <div class="mb-4">

                <label for="selectedLanguage" class="form-label" style="font-weight: 600;">Select language</label>

                <select id="selectedLanguage" class="form-select form-select-lg" @bind="selectedLanguage">

                    @foreach (var language in languages)

                    {

                        <option value="@language">@language</option>

                    }

                </select>

            </div>

            <div class="d-grid gap-2">

                <button type="submit" class="btn btn-primary btn-lg" style="background-color: #007bff; border-color: #007bff;">Translate</button>

            </div>

        </EditForm>

        @if (!string.IsNullOrEmpty(translatedText))

        {

            <div class="mt-5 p-4 bg-light rounded">

                <h4 class="text-primary">Translated Text:</h4>

                <p class="text-dark">@translatedText</p>

            </div>

        }

    </div>

</div>

@code {

    protected override async Task OnInitializedAsync()

{

    if (TranslationService == null)

    {

        translatedText = "Translation service is not initialized.";

    }

    // Initialize other properties here if necessary

}

     private string inputText = string.Empty;

     private string selectedLanguage = "en"; // Default to "en" or any preferred language.

    private string translatedText;

    private List<string> languages = new List<string> { "en", "es", "fr" };

[Inject]

private TranslationService TranslationService { get; set; }

     private async Task TranslateText()

    {

        if (TranslationService == null)

        {

            translatedText = "Translation service is not available.";

            Console.WriteLine("TranslationService is null.");

            return;

        }

        Console.WriteLine($"Translating '{inputText}' to '{selectedLanguage}'");

        if (string.IsNullOrEmpty(inputText) || string.IsNullOrEmpty(selectedLanguage))

        {

            translatedText = "Please provide both text and language.";

            return;

        }

        try

        {

            translatedText = await TranslationService.TranslateAsync(inputText, selectedLanguage);

        }

        catch (Exception ex)

        {

            translatedText = $"Translation failed: {ex.Message}";

        }

    }

}
Run and Test
To run the web application, execute the program using `dotnet run` and open a web browser. The interface will appear as shown. To see a demonstration of how it works, visit the following demo page which uses the same code.